
Sewing Bias-Cut Garments
Shop my bias-cut Sicily Slip Dress pattern here!
When a fabric is cut on the bias, it means that the pattern pieces are not laid down onto the fabric straight, but diagonally. The diagonal direction of fabrics (the bias) has got greater stretch than the straight grain. Therefore garments that have been cut on the bias, drape softly over the body’s curves and accentuate them.
Bias-cut dresses had their first moment in the spotlight with the fashion designer Madeleine Vionnet in the 1930s. Bias-cut garments that clung to the natural curves of the body were revolutionary for that time.
Madeleine Vionnet famously said:
The dress must not hang on the body but follow its lines. When a woman smiles the dress must smile with her.
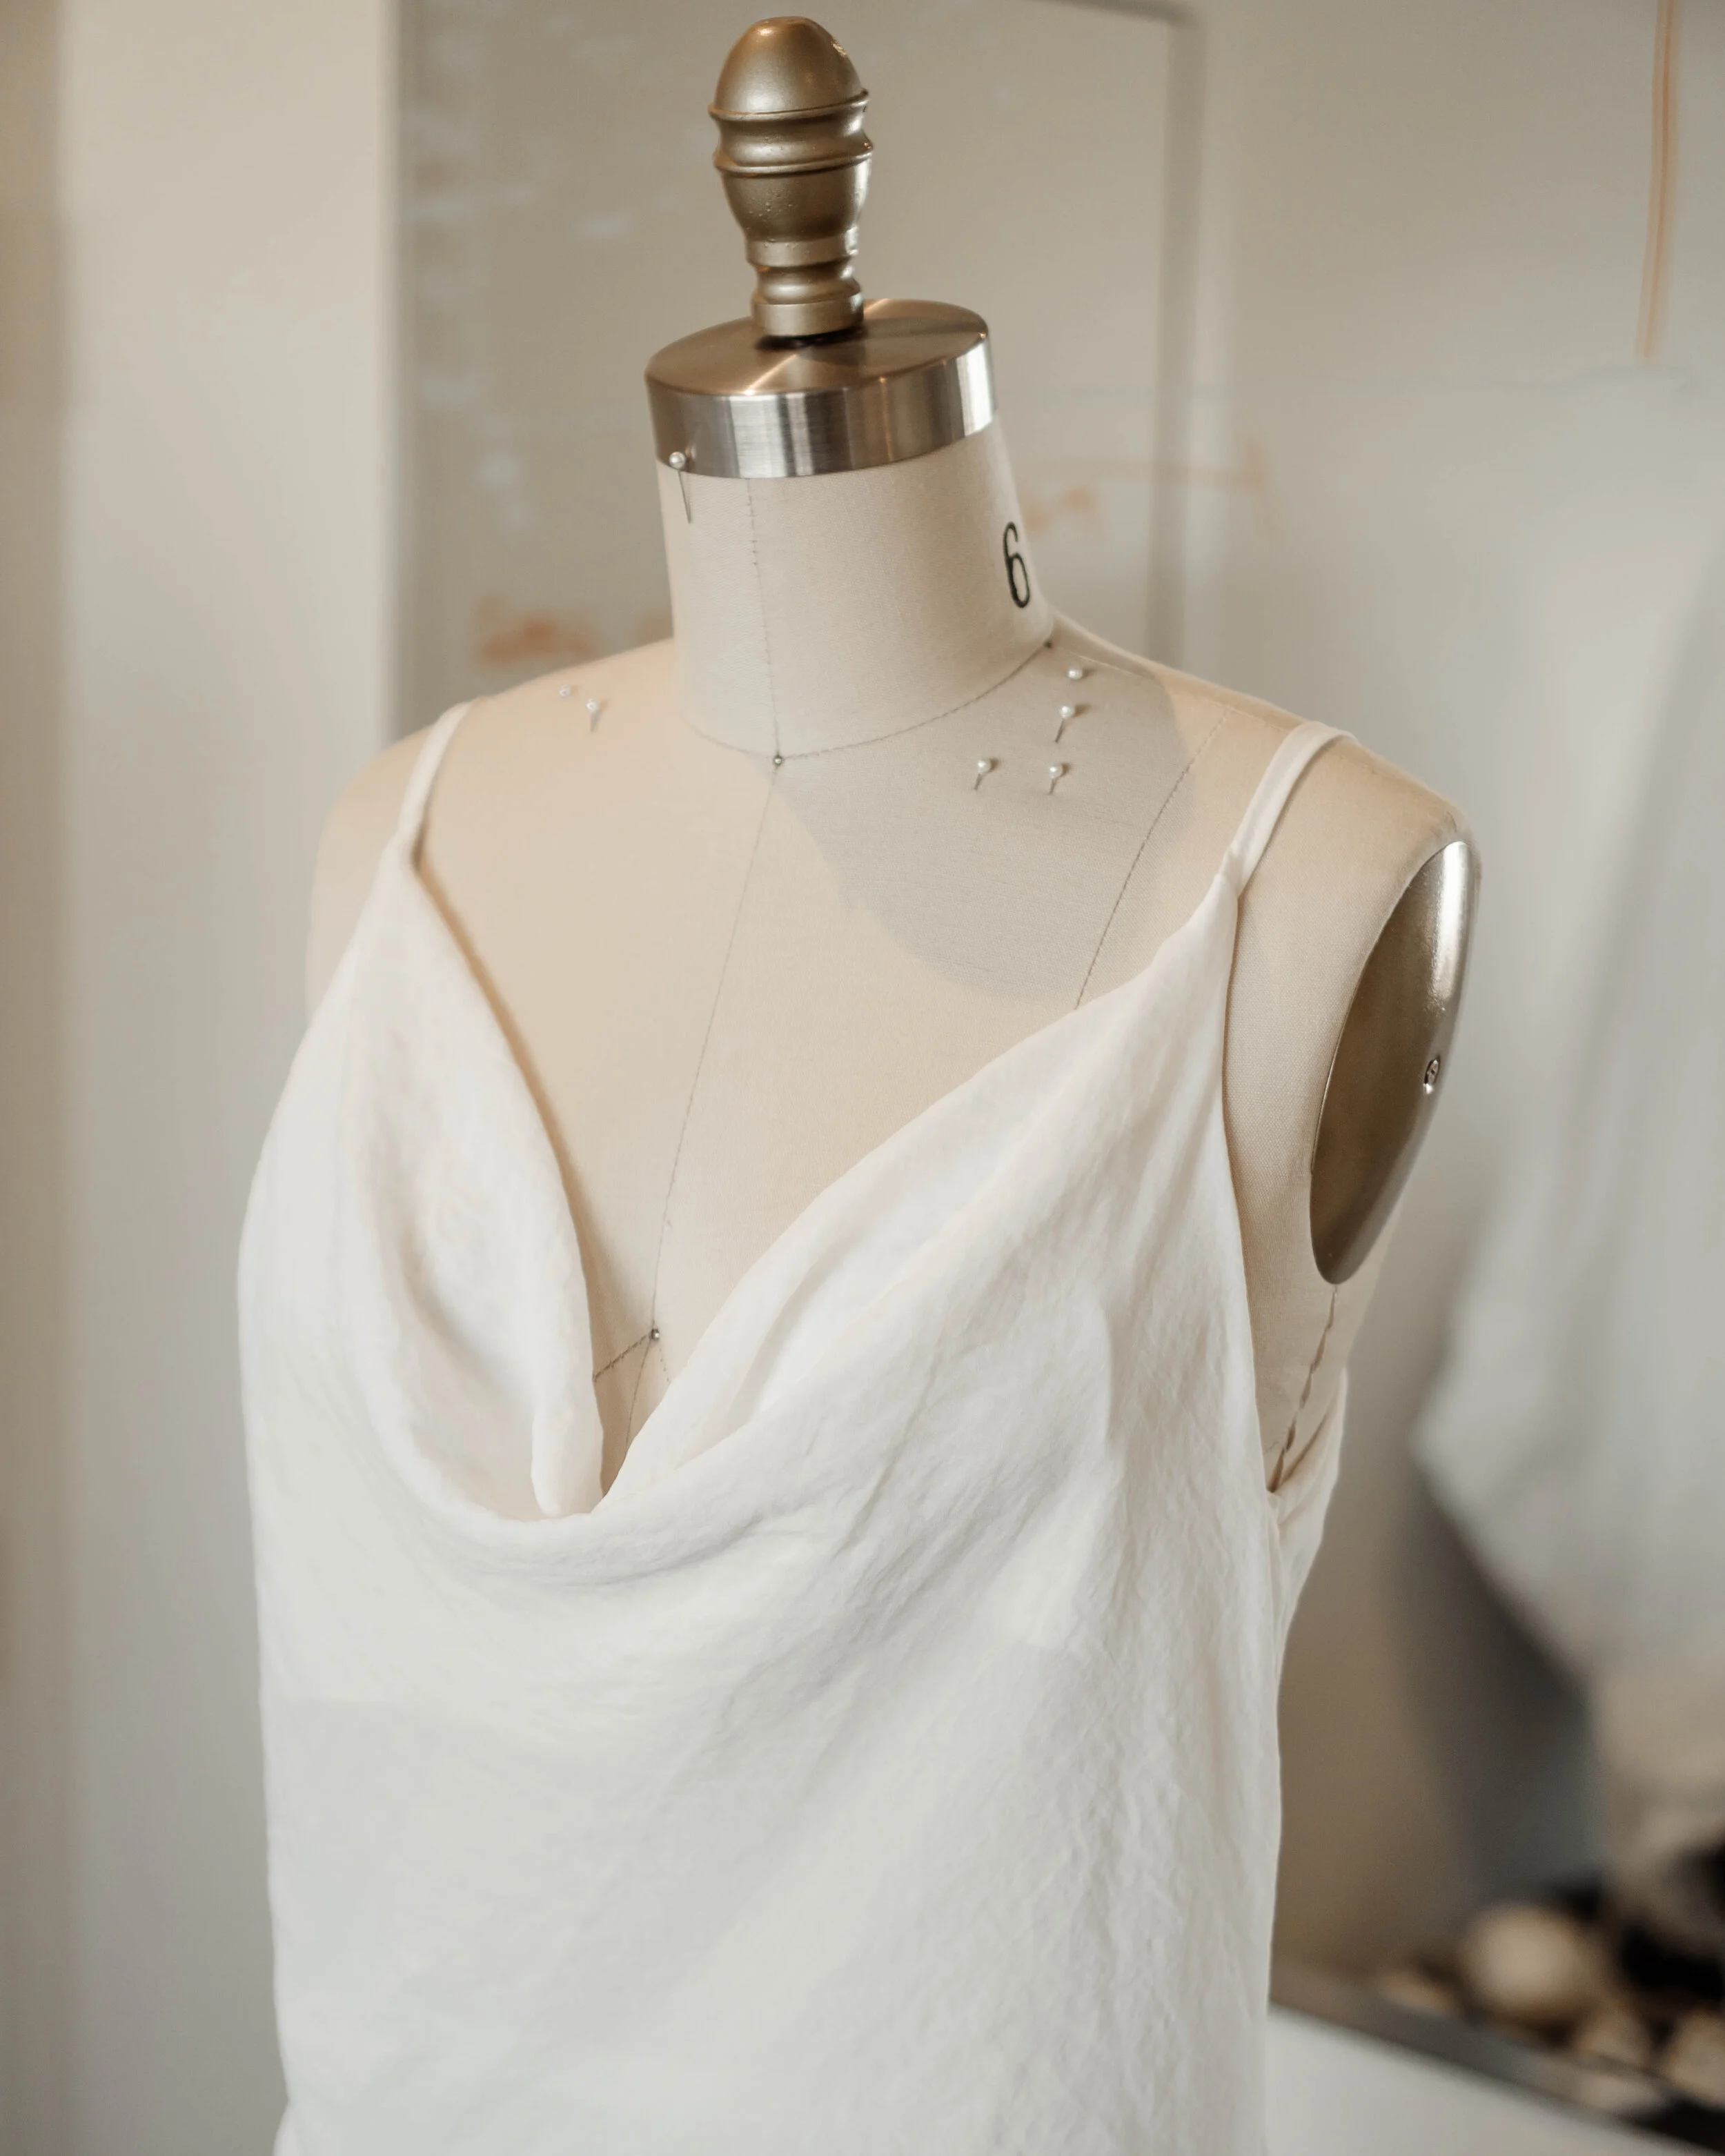
I have always been obsessed with bias-cut dresses. They are so comfortable to wear and they make me feel pretty. In this blog entry, I want to pass on everything I have learned about working on the bias. I did a lot of research and testing whilst creating my newest sewing pattern The Sicily Slip Dress (to be released soon).
Bias-cut sewing does not have to be intimidating. If you follow these few simple steps, you will be able to achieve professional-looking results in no time!
How to find the True Bias
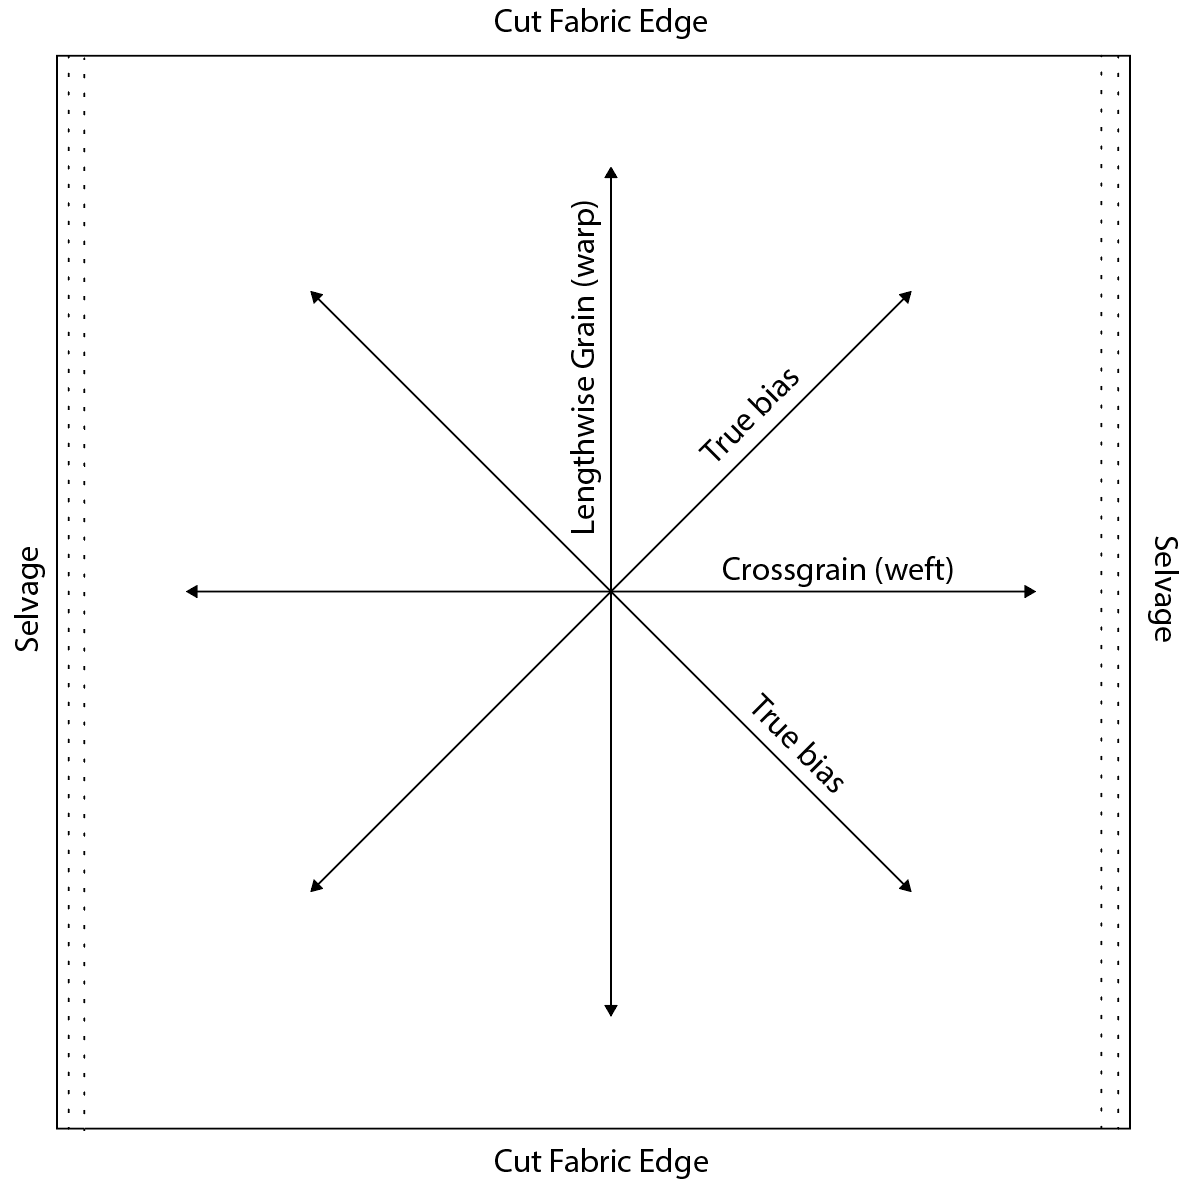
The bias can be any diagonal line. The true bias refers to a 45 degree angle to the straight grain.
Selvage: Industrially finished fabric edge.
Best Fabrics to work with
You can work with many different fabrics for bias-cut garments, but it is recommended to use a light- to medium-weight fabric. It is important that the fabric has a nice drape to it. Here are some options that would work very well for a bias-cut dress:
Silk Satin, Rayon/Viscose Satin
Crepe, Flat crepe, Crepe de Chine, Satin-Back Crepe
Rayon/Viscose Blends
Chiffon
Charmeuse
Georgette
Lightweight linen
Stretch behavior of bias-cut fabrics
As the fabric stretches in length, the width decreases.
The crossgrain fibers are not twisted as tightly as the lengthwise grain fibers.
The crossgrain fibers fall more easily on the bias, which means that the fabric stretches more and hangs longer at the hem on one side.
Once the bias has stretched, it keeps the shape and does not go back to what it was before.
Cutting
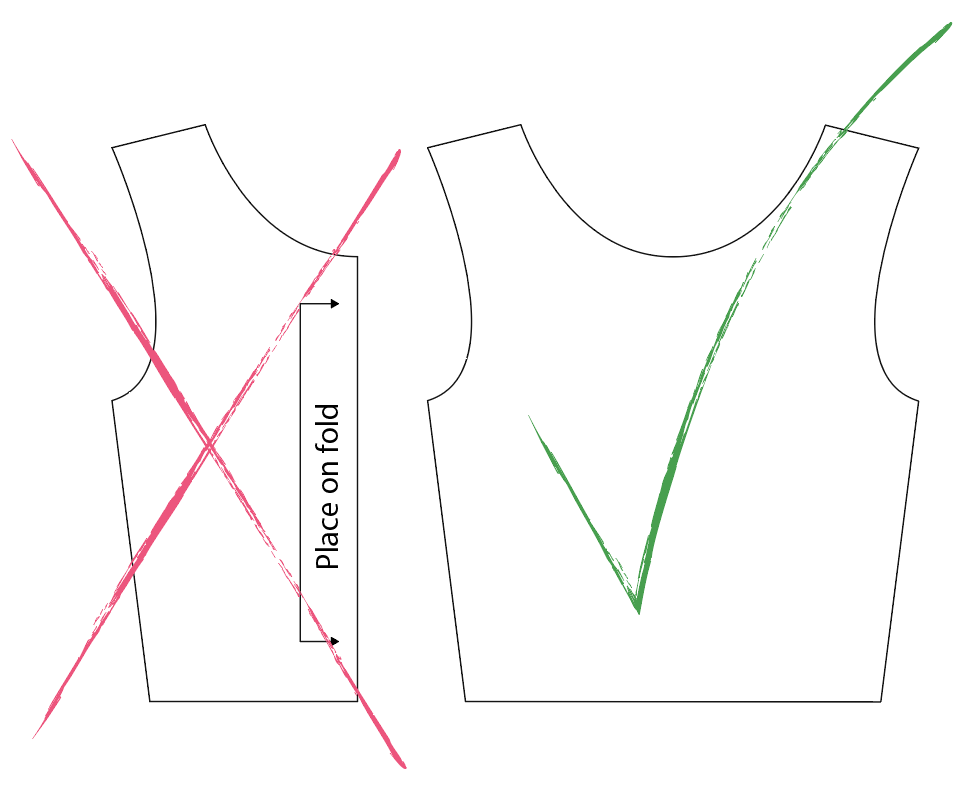
Full pattern pieces
It is very important to know, that you can not cut bias pattern pieces on the fold. To cut your fabric exactly, you need full pattern pieces that you can lay on ONE layer of fabric.
How to arrange the pattern pieces on your fabric
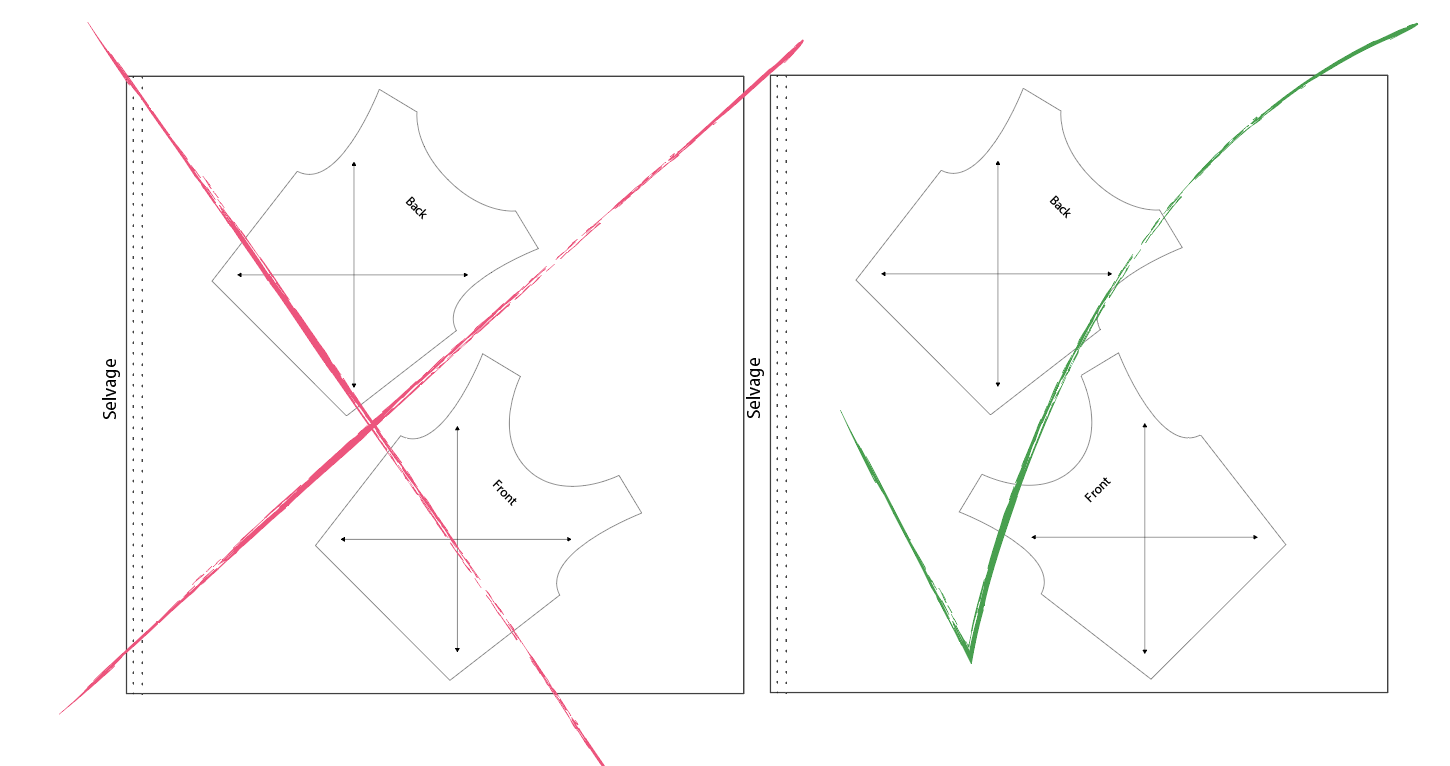
As said before, each pattern piece has two true biases, both 45 degrees to the straight grain. When deciding how to place your front and back pattern piece, it is best to position them perpendicular to each other. This will make the garment balanced which means that it is not going to twist around your body when you are wearing it.
Measure Grainline to Selvage
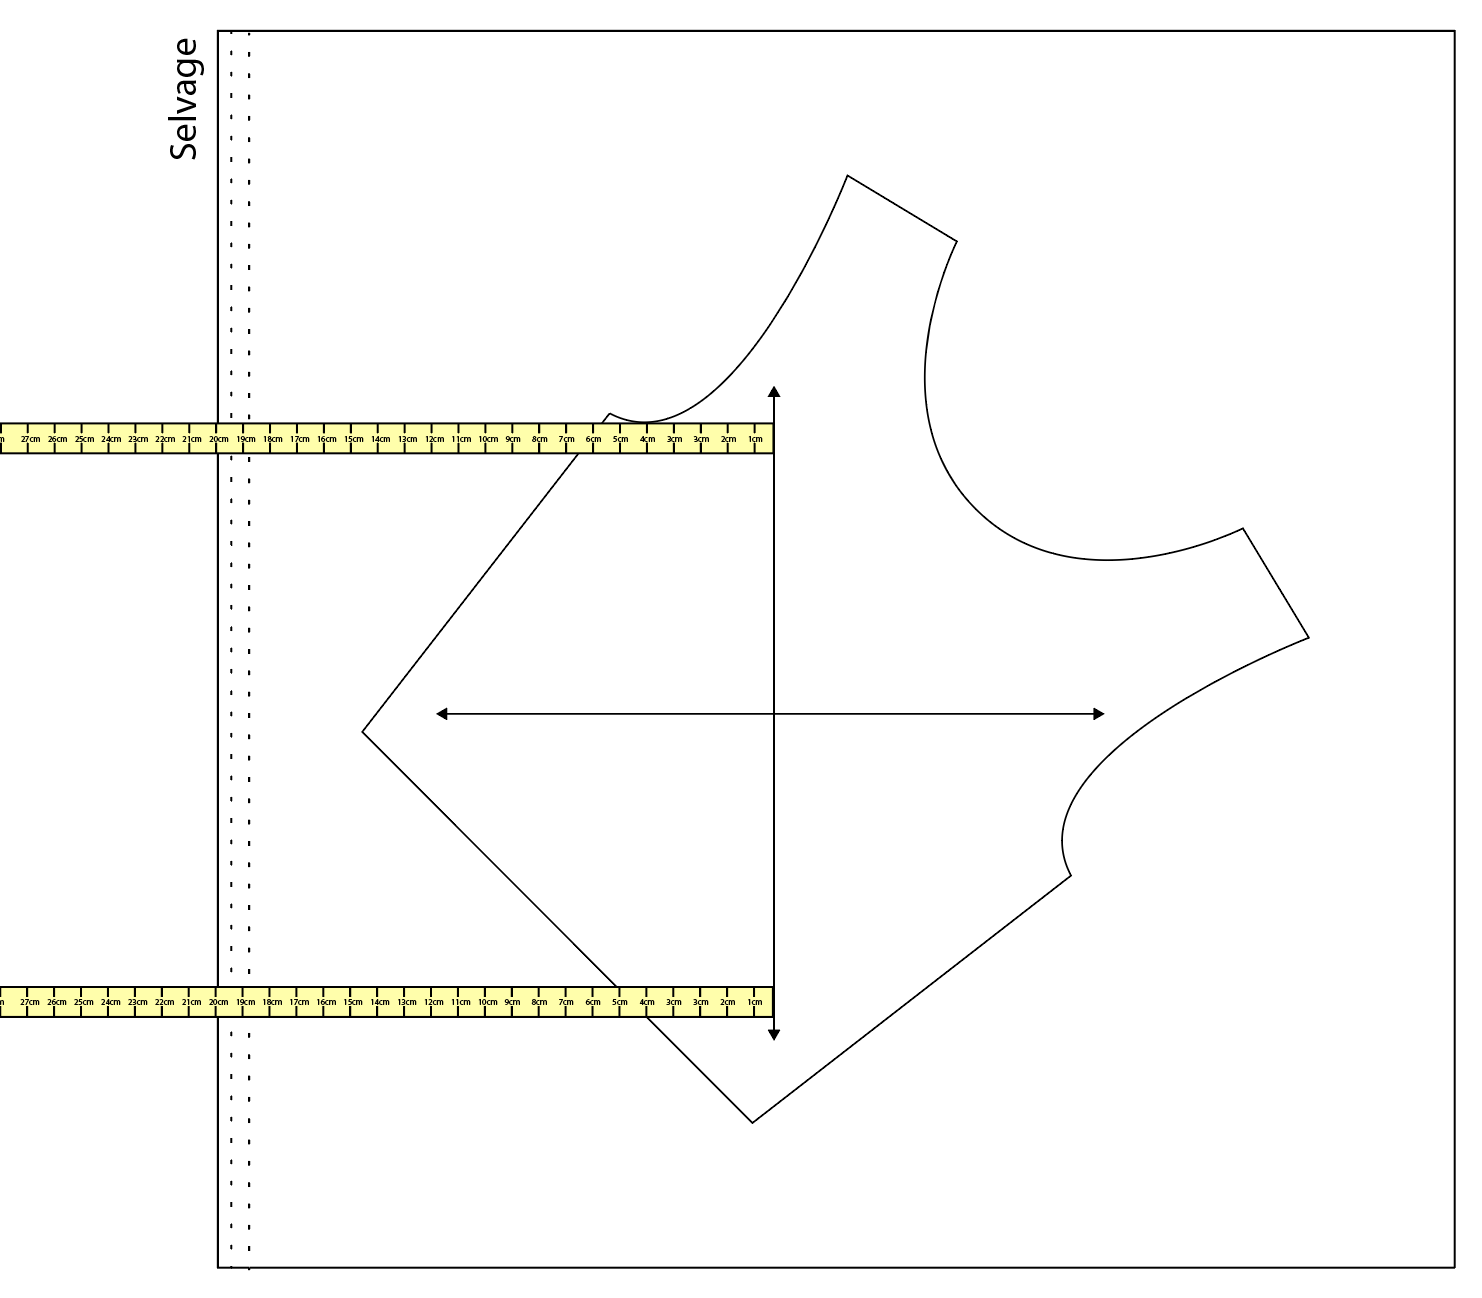
To ensure that you are cutting on the true bias, it is recommended to measure it. Measure at two different points of the grainline to ensure that the grainline runs parallel to your selvage. The selvage is the industrially finished edge of your fabric, the edge that does not fray.
Use a lot of pins
Cutting pattern pieces on the bias requires a lot of patience and exactness. To make sure the fabric is not stretching as you lift it up a tiny bit to cut with scissors, you need as many pins as possible.
Sewing
Staystitch
To stabilize your pattern pieces it is best to stay stitch all pieces 3mm / 1/8“ away from the raw edge. This will keep the pattern pieces from stretching during the sewing process.
Narrow zigzag
As I have explained before, bias-cut garments stretch once they are sewn up. If your side seam stitching does not stretch with the fabric, it creates a weird gathered effect. To avoid that from happening, it is best to use a very narrow zigzag stitch. I normally set my stitch length to 2.5 and select the narrowest option for my zigzag stitch. As you might know, zigzag stitches are stretchy and will move with the fabric.
Don’t pull whilst sewing
Another important aspect is, that you do not pull your fabric whilst you are sewing. It is very easy to stretch raw edges of bias-cut pattern pieces, so be extra gentle. As well as not pulling your fabric during the sewing process, you also shouldn’t let it hang off the table whilst sewing. Try to keep the garment on your table so it cannot stretch when hanging down.
Hang overnight before hemming
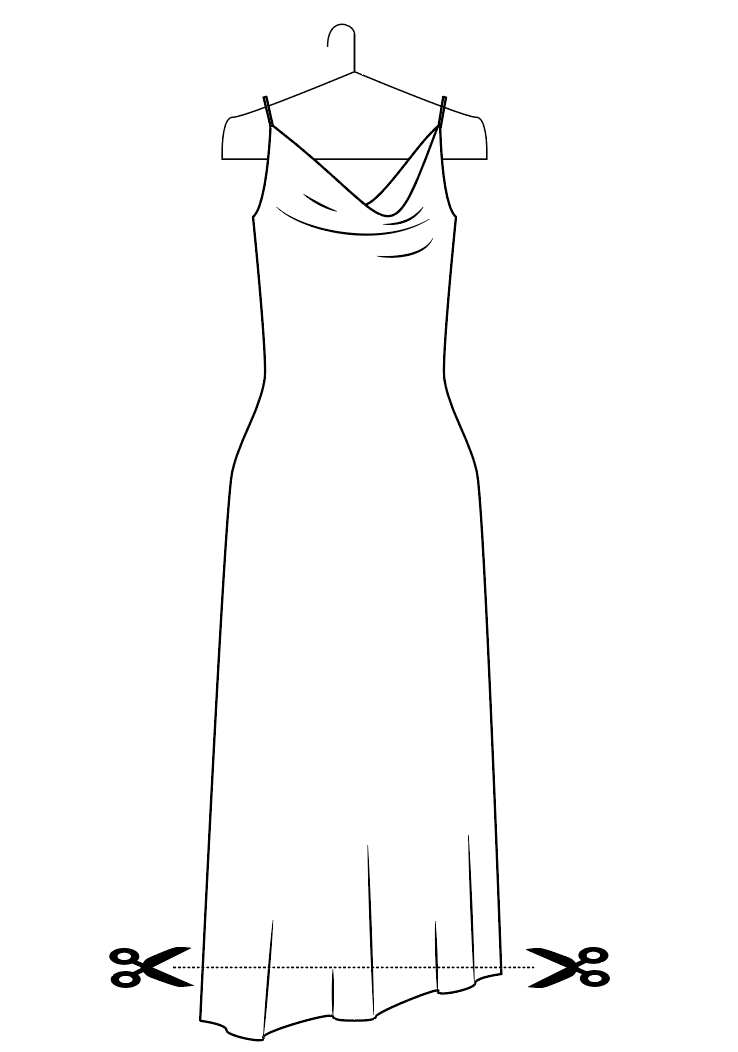
Before hemming your garment, it is very important to hang it from a dress form or from a hanger overnight. After approximately 24 hours, you might notice, that your fabric has stretched more on one side of the garment than on the other. This happens because the lengthwise grain fibers are twisted more tightly than the crossgrain fibers. Therefore the crossgrain fibres fall more easily. This is why the fabric stretches more and hangs longer at the hem on one side.
If this happened to your garment, even out the hem by cutting off any excess fabric. Once your raw hem is even all around the garment, you can finally hem it.
Ironing
Do not pull the fabric whilst ironing because it can stretch and deform it. Instead, try to gently press one area with your iron then lift the iron off the fabric, move it to the next spot and press.
Storage
Once you are finished with your bias cut garment, make sure to treat it with care. To make it last for a long time, store your bias-cut garment flat, do not hang it up with the other dresses in your wardrobe. Storing your bias-cut garment flatly avoids further stretching.
Shop my bias-cut Sicily Slip Dress pattern here!